Welcome! Today I will be teaching you how to quickly and easily make custom sprays for GoldSrc engine games such as Half-Life, Counter Strike 1.6, and Sven Co-Op. The file format used is the same for each of these games, so you can use the same spray across all of them. I will be showing off two different tools: spraytool.net and HL_tagconverter.
SprayTool.net
This website is easy to use to make custom sprays. The site says Counter Strike 1.6, but the sprays will work with other GoldSrc games as well.
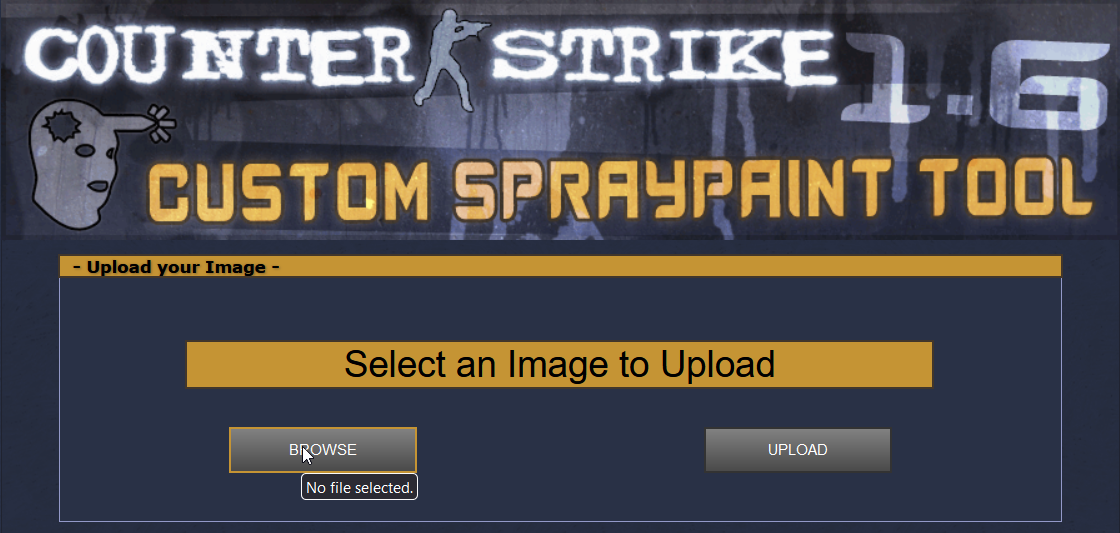
First you need to select an image to use as your spray. The image must be a: PNG, BMP, JPG, GIF, or WAD file. It must also be 5.0 MB or less in size. GoldSrc sprays are quite small in resolution so don't pick an image with small text or a lot of small details. Once you have selected your image, click the button labelled UPLOAD.

You will be taken to this screen where you can adjust the size and the transparency if you uploaded an image with transparency. A GoldSrc spray can only be within a certain range of sizes. Usually I tend to leave mine perfectly square. I also personally can't get the transparency to work when using this site (the spray doesn't have transparency in-game for whatever reason.) That's why I use HL_tagconverter when I want transparency. Click PREVIEW when you are done adjusting the image.
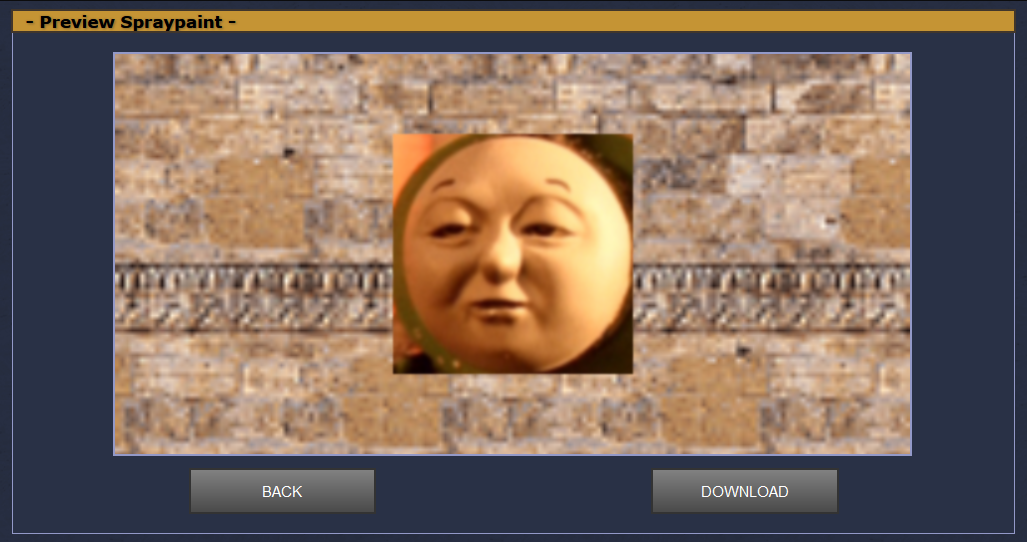
This will show you a preview of what the spray will look like in-game. If you aren't satisfied you can click BACK to readjust the image or chose a different one. Otherwise, click DOWNLOAD. Your spray will be downloaded in the form of a "tempdecal.wad" file. You can save this file anywhere you wish for now, though I usually save it to the Desktop for convenience.
HL Tag Converter

Using The Spray
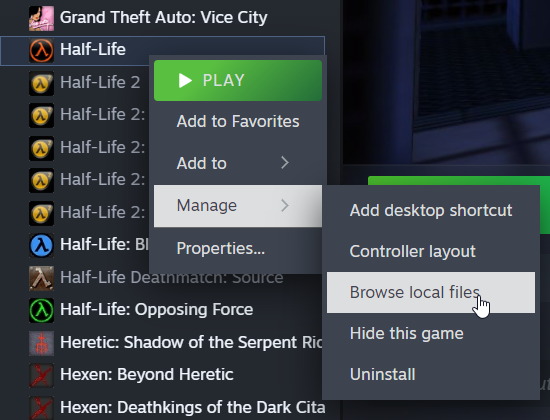
Now that you have made your spray, it's time to actually get to using it. First you need to go into the directory of the game you want to use the spray in. You can do this by going into your Steam library, left-clicking the game from the list on the left, hovering over "Manage", and then clicking "Browse local files".
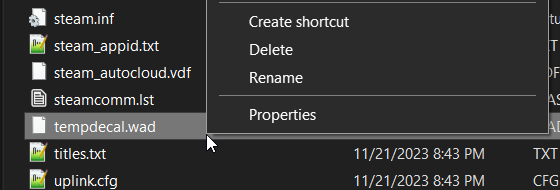
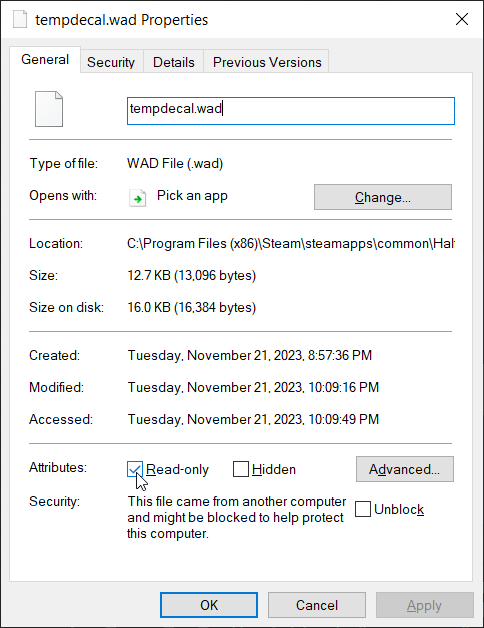
Once you are in this folder you must go into another folder. The name of this folder depends on the game. For Half-Life the folder is "valve", and for Sven Co-Op the folder is "svencoop". In this folder there should be the file "tempdecal.wad". Delete this file and drag the "tempdecal.wad" file you previously made into this directory. Once that is done left-click that same file and click "Properties" at the bottom of the drop-down menu. In the window that opens, set the file to "Read-only". This will prevent the game from overwriting this file. Don't forget to click "Apply".
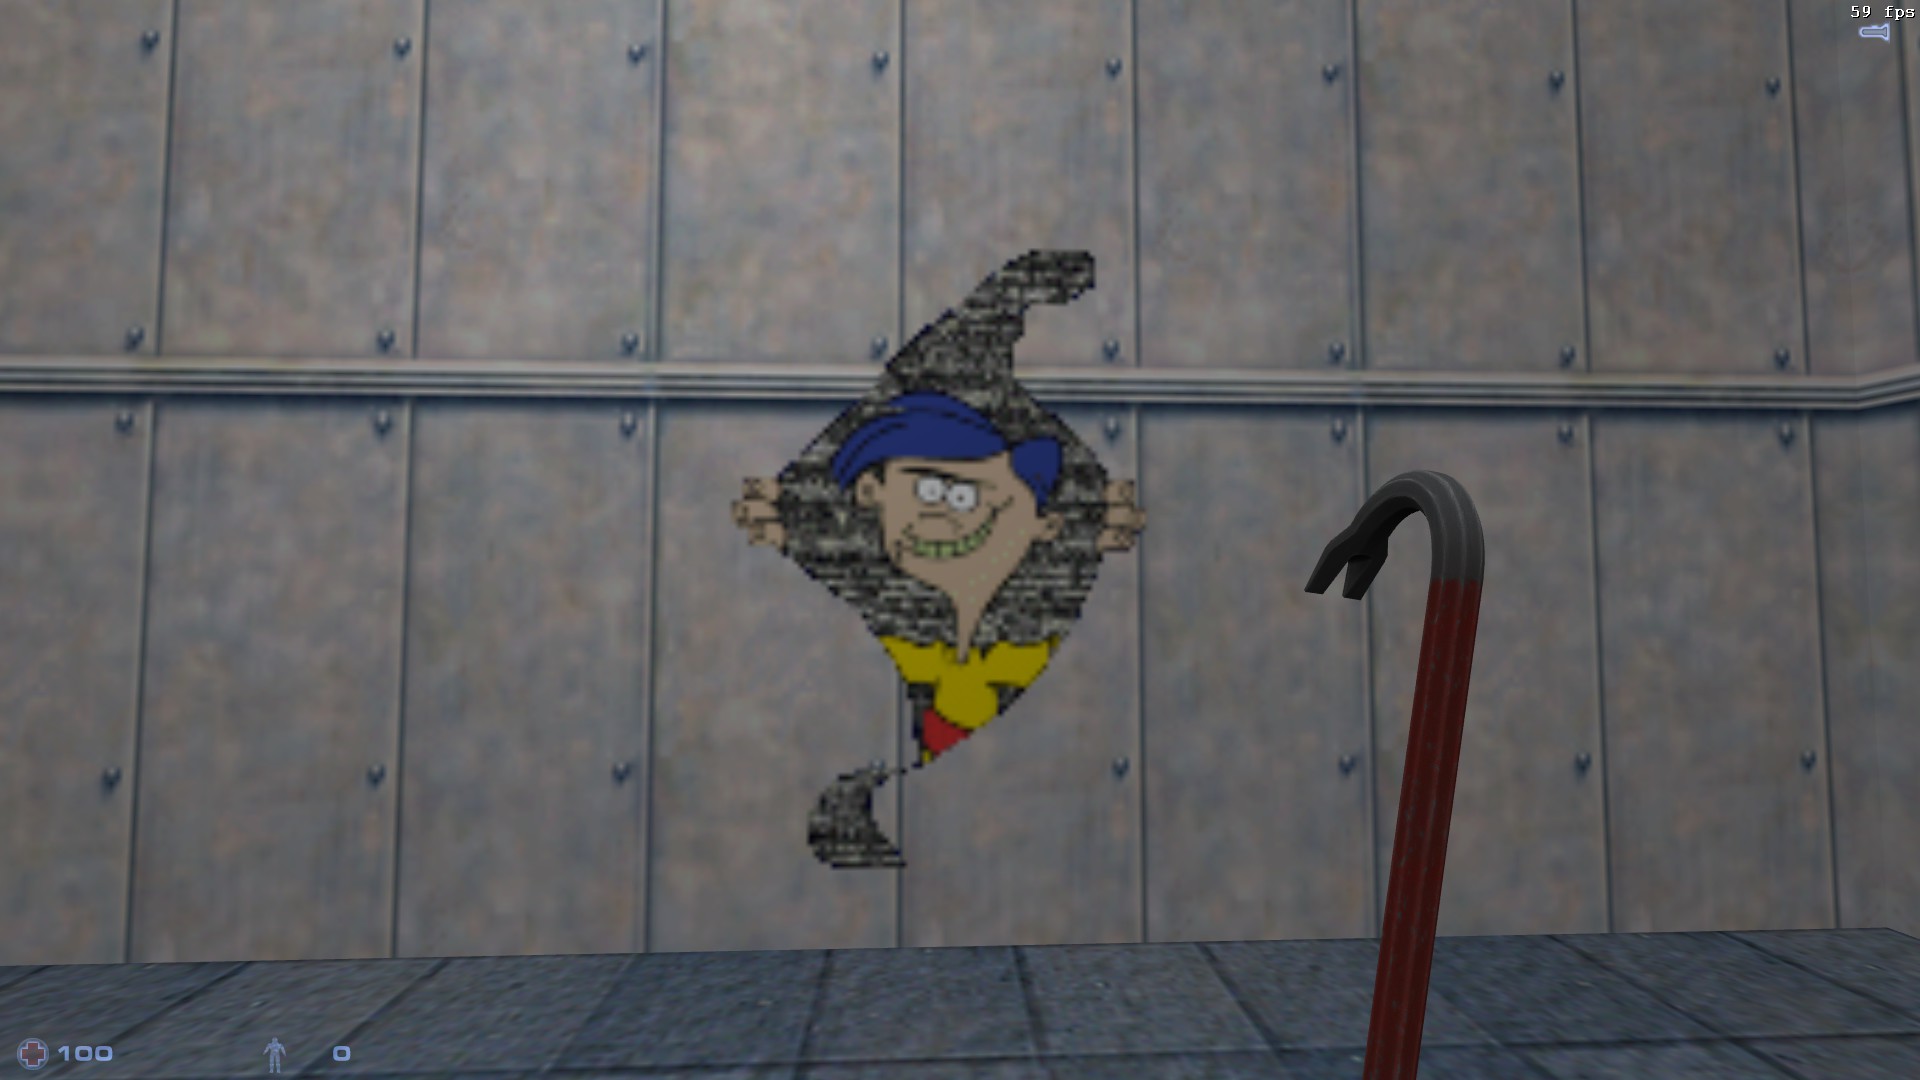
After that your spray should show up when sprayed in-game. Other players should also be able to see your custom spray. You should be able to see theirs if they have one.
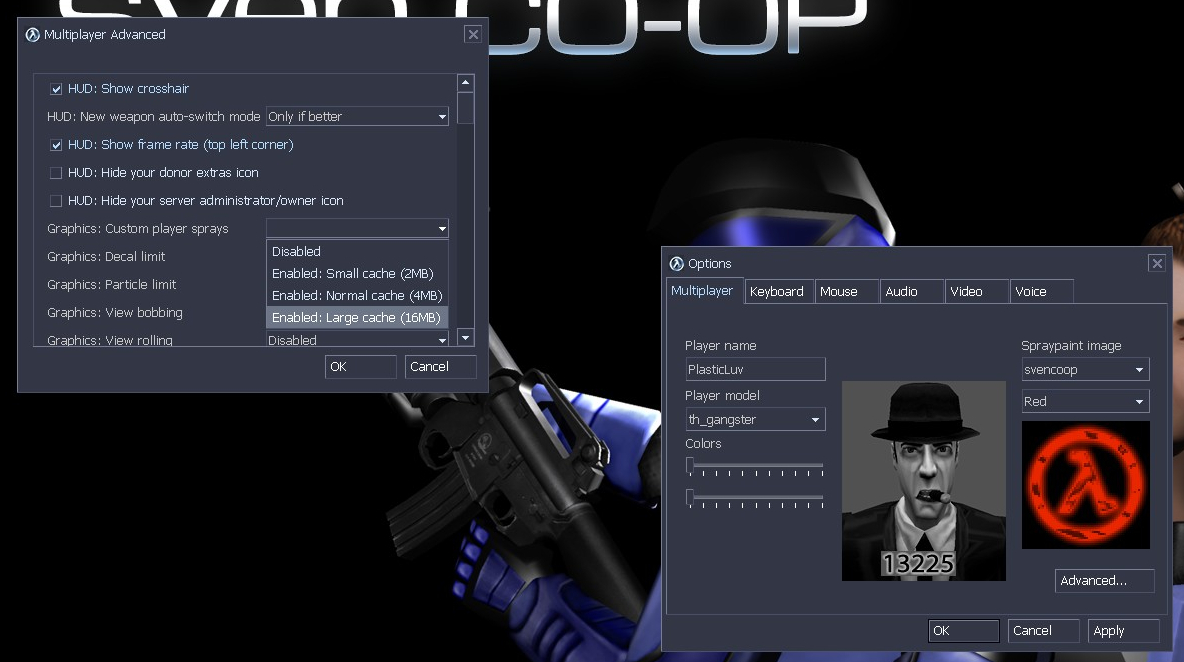
If you can't see other players' custom sprays, or if they can't see yours you/they may need to go into the settings and enable custom sprays. Go into the options menu of the game, go to the multiplayer tab, click "Advanced...", and enable custom player sprays.